Local TTS: Make Your AI Speak
Local TTS: Make Your AI Speak
Introduction
Give your local AI a voice: type text in, get natural speech out. By 2026, open-source TTS has matured considerably — Chinese synthesis is close to human quality, voices can be cloned from 3 seconds of audio, and some options even run on CPU. This guide helps you choose, walks through a deployment with CosyVoice (the strongest option for Chinese), and finally hooks TTS into your local AI assistant.
1. Choosing an Open-Source TTS in 2026
| Option | Team | License | Chinese | Zero-shot cloning | Highlights |
|---|---|---|---|---|---|
| CosyVoice 2/3 | Alibaba Tongyi | Apache 2.0 | ★★★★★ | ✅ 3s audio | Best Chinese quality, fast streaming, dialects, emotion control |
| Fish Speech 1.5 | Fish Audio | Apache 2.0 | ★★★★ | ✅ 10s audio | Multilingual, active community, built-in WebUI |
| GPT-SoVITS v2 | Community | MIT | ★★★★ | Few-shot fine-tune | Cloning king (57K stars), mature toolchain |
| ChatTTS | 2noise | Custom | ★★★★ | ❌ | Natural conversation (pauses/laughs/breaths) |
| Kokoro TTS | Kokoro | Apache 2.0 | ★★ | Limited | Only 82M params, CPU-friendly, very fast |
| VoxFlash-TTS | VoxFlash | Docker public | ★★★★ | ✅ | Speed-first, real-time interaction |
Recommendations:
- Chinese voice-over, audiobooks, or giving your agent a voice → CosyVoice (quality + cloning + dialects)
- Multilingual, want a painless WebUI → Fish Speech
- Cloning a specific person’s voice with a little training data → GPT-SoVITS
- No GPU or low VRAM → Kokoro (good English, limited Chinese)
- Real-time dialogue, latency-sensitive → VoxFlash-TTS
“Zero-shot cloning” means imitation with no training — just a reference audio clip. Similarity depends on the quality of the reference and the model; it is not an exact duplicate.
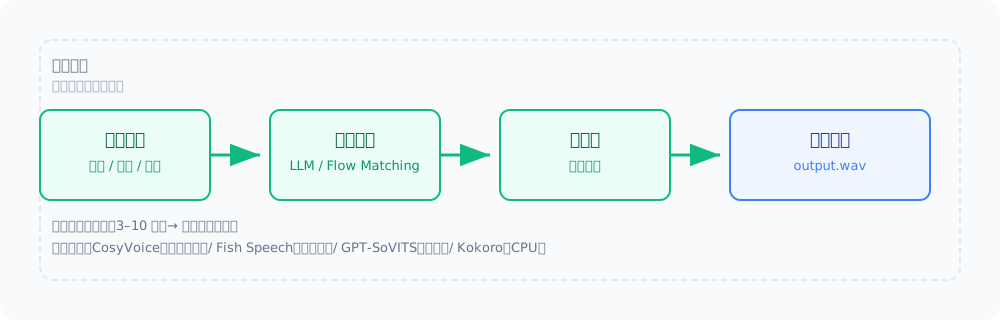
2. Main Path: Deploying CosyVoice
2.1 Option A: Docker one-liner (recommended)
# Pull the official image (large on first pull)
docker pull funaudio/cosyvoice3

# Run (WebUI on port 8080, GPU accelerated)
docker run --gpus all -p 8080:8080 funaudio/cosyvoice3
Open http://localhost:8080, type text → pick a preset voice → synthesize. Ready to go.
2.2 Option B: From source
git clone https://github.com/FunAudioLLM/CosyVoice.git
cd CosyVoice
pip install -r requirements.txt

# Start the WebUI (GPU build)
python -m cosyvoice.cli.webui --port 8080
- Hardware: 8GB+ VRAM recommended (M3 Max-class Macs work too, with
PYTORCH_ENABLE_MPS_FALLBACK=1) - Models download automatically and are large — reserve 20GB+ of disk
- If downloads are slow in your region, use the hf-mirror endpoint (
HF_ENDPOINT=https://hf-mirror.com)
2.3 Synthesizing directly from Python
Skip the WebUI and do it in a few lines:
from cosyvoice.cli.cosyvoice import CosyVoice2

cosyvoice = CosyVoice2('pretrained_models/CosyVoice2-0.5B', load_jit=False)

for output in cosyvoice.inference_sft('Hello, I am a locally deployed voice assistant.', '中文女'):
    output['tts_speech'].save('output.wav')
3. Voice Cloning: Replicate a Voice from 3 Seconds of Audio
CosyVoice zero-shot cloning workflow:
- Prepare a 3–10 second reference clip: clean voice, no background music (wav/mp3)
- Provide it as the prompt voice in the WebUI or in code:
prompt_speech = 'reference.wav'
for output in cosyvoice.inference_zero_shot('Repeat this line in that voice.', prompt_speech, '中文女'):
    output['tts_speech'].save('cloned.wav')
Notes: the cleaner the reference, the higher the similarity; dialects are inherited too (CosyVoice 3 supports 18 dialects).
4. Lightweight Alternative: Kokoro (No GPU Needed)
pip install kokoro onnxruntime

python - <<'EOF'
from kokoro import KPipeline
pipeline = KPipeline(lang_code='a')
for result in pipeline('Hello from Kokoro, running on CPU.', voice='af_heart'):
    result.audio.save('kokoro.wav')
EOF
Note: Kokoro’s Chinese support is limited (English-first). For Chinese, prefer CosyVoice or Fish Speech.
5. Connecting to Your Local AI: Giving Your Agent a Mouth
Following the ideas in Function Calling & MCP (Chinese), let the LLM decide when to speak:
- Wrap TTS as a tool:
text_to_speech(text, voice)→ returns an audio file path - The model calls the tool during a conversation
- The client plays
output.wav— your assistant now talks
import subprocess
def text_to_speech(text: str, voice: str = "中文女") -> str:
    subprocess.run(["python", "tts_cli.py", text, voice])
    return "output.wav"  # path returned for the frontend to play
You can also use Open WebUI’s TTS plugin (Chinese) to read replies aloud right in the chat UI.
FAQ
Accents or dropped syllables in Chinese? Switch to CosyVoice (Chinese CER ≈ 0.8%, best in the open-source tier); make sure the text has no rare words and sensible punctuation; use CosyVoice 3 dialect voices for dialects.
Synthesis too slow? Streaming only waits for the first packet (CosyVoice ≈ 150ms); split long text and synthesize in parallel; if truly GPU-less, prototype with Kokoro first.
Clone sounds off? The reference must be clean (no echo/music, single speaker), 3–10 seconds, normal pace; use a 48kHz high-quality source.
Can I use it commercially? Licenses differ: CosyVoice/Fish Speech/Kokoro are Apache 2.0 (commercial OK); ChatTTS and GPT-SoVITS require checking their own licenses; and you must obtain permission from the person whose voice you clone.
Risks
- Voice cloning touches portrait rights and personal information: cloning someone’s voice without consent for public content may constitute infringement (China’s Civil Code Art. 1023 protects natural persons’ voices by reference to portrait rights). Only use your own voice, authorized material, or synthetic voices
- For podcasts, ads, or customer service, disclose that the audio is “AI-generated”
- Fraudulent or disinformation uses are illegal — stay on the right side
Next Steps
- Give your model tools and a brain → Function Calling & MCP (Chinese)
- Chat UI with voice integration → Open WebUI (Chinese)
- Voice-over for videos (TTS + video generation) → Local AI Video Generation
- Isolate the TTS service with Docker GPU Containers (Chinese) for a clean, stable setup
This is a pilot English translation. The rest of the tutorial library is available in Chinese at the main tutorial hub.
评论
Comments are powered by GitHub Discussions — sign in with a GitHub account to join the conversation.